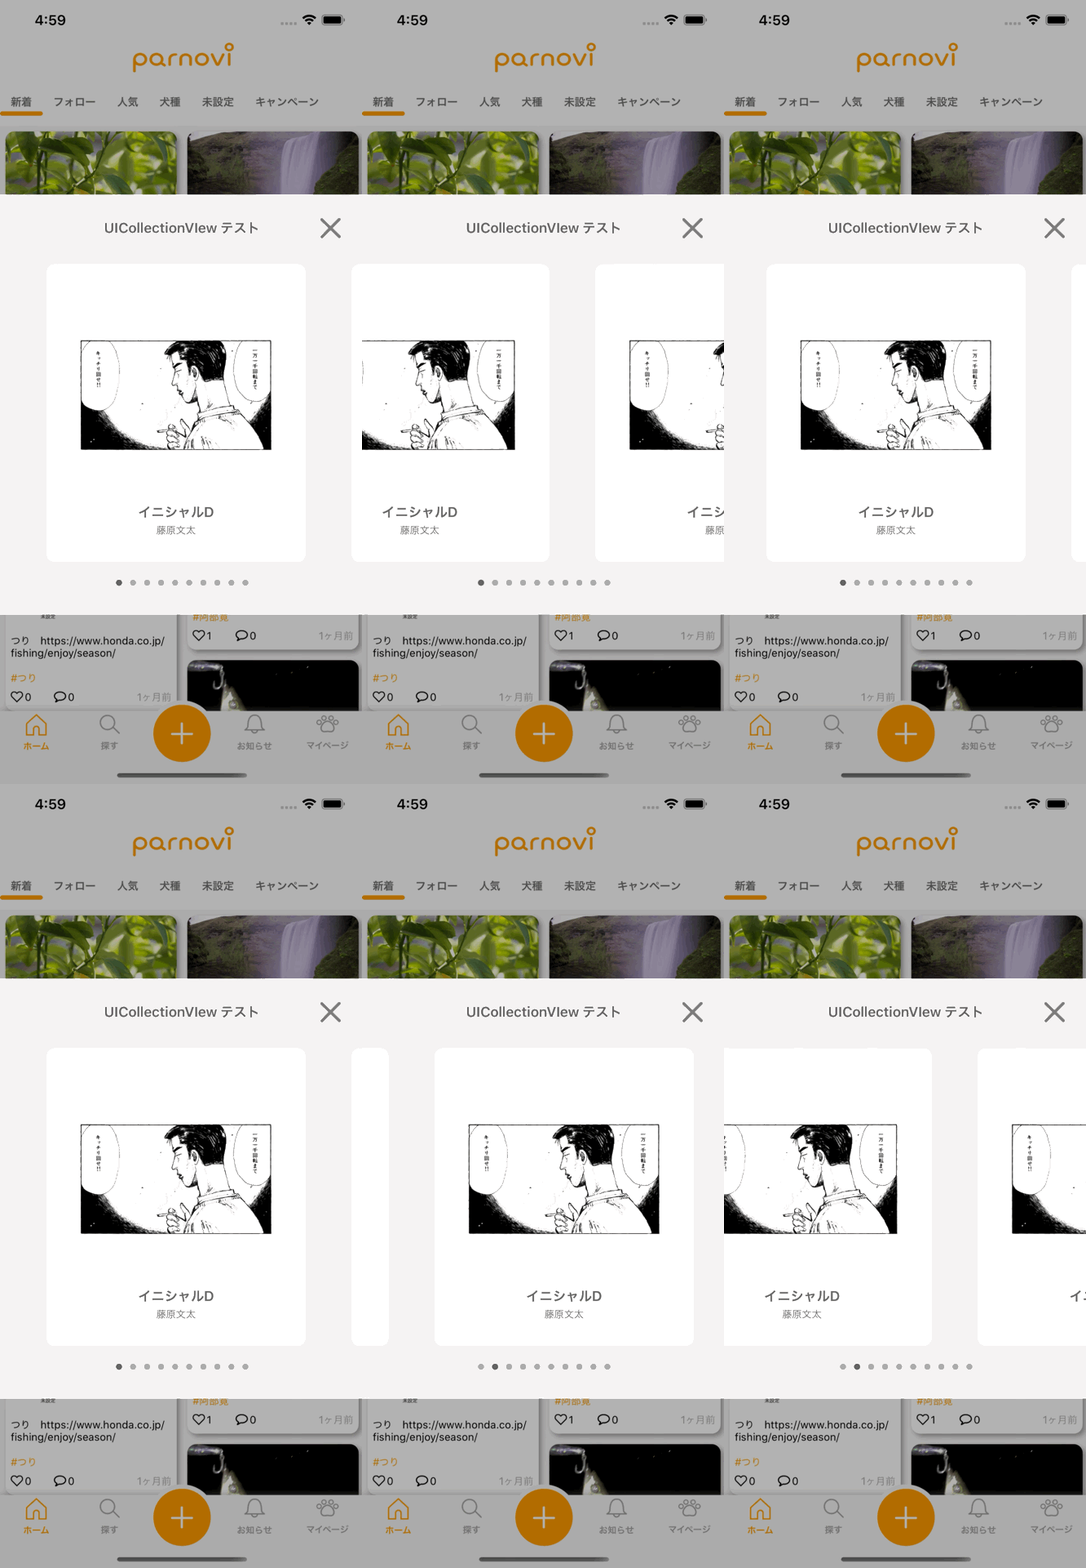
みなさん、最近 CollectionView は使っていますでしょうか?CollectionView っレイアウトの方法がいっぱいあってどれを使うべきか結構迷いますよね〜🤷♀️
今回はそんな CollectionView を使って、ページをめくるようにスクロールすることのできる UI を作ってみたいと思います。
完成イメージ
下記のように、一定以上スクロールした時に次のページに移動できる、少しスナップの効いた CollectionView を作っていきたいと思います👷♀️

コード
まずは、完成したコード全体を覗いて見ます👀 上ブロックが CollectionView を保持した UIView のサブクラスで、下ブロックが CollectionView レイアウトのカスタムクラスになります。また、CollectionView のカスタムクラスは xib で指定しています。
class NotificationDialogView: UIView {
    @IBOutlet private weak var titleLabel: UILabel!
    @IBOutlet private weak var collectionView: UICollectionView! {
        didSet {
            collectionView.register(nibName: NotificationDialogItemCell.className())
            collectionView.register(nibName: NotificationDialogLinkItemCell.className())
            collectionView.dataSource = self
        }
    }
    @IBOutlet private weak var flowLayout: NotificationDialogCollectionViewFlowLayout! {
        didSet {
            flowLayout.delegate = self
        }
    }
    @IBOutlet private weak var pageControl: UIPageControl! {
        didSet {
            pageControl.numberOfPages = page
        }
    }

    private let page = 10

    override init(frame: CGRect) {
        super.init(frame: frame)
        addCustomViewFromNib()
    }

    required init?(coder: NSCoder) {
        super.init(coder: coder)
        addCustomViewFromNib()
    }
}

extension NotificationDialogView: UICollectionViewDataSource {
    func collectionView(_ collectionView: UICollectionView, numberOfItemsInSection section: Int) -> Int {
        return page
    }

    func collectionView(_ collectionView: UICollectionView, cellForItemAt indexPath: IndexPath) -> UICollectionViewCell {
        let cell = collectionView.dequeue(for: indexPath) as NotificationDialogItemCell
        return cell
    }
}

extension NotificationDialogView: NotificationDialogCollectionViewFlowLayoutDelegate {
    func notificationDialogCollectionViewFlowLayout(pageDidChange page: Int) {
        pageControl.currentPage = page
    }
}
protocol NotificationDialogCollectionViewFlowLayoutDelegate: class {
    func notificationDialogCollectionViewFlowLayout(pageDidChange page: Int)
}

// Set as xib custom class.
final class NotificationDialogCollectionViewFlowLayout: UICollectionViewFlowLayout {
    private let velocityThreshold: CGFloat = 0.1
    weak var delegate: NotificationDialogCollectionViewFlowLayoutDelegate?

    override func awakeFromNib() {
        super.awakeFromNib()
        itemSize = CGSize(width: 295, height: 340)

        let nextItemSpace: CGFloat = 14
        let itemSpace = (UIScreen.main.bounds.width - (itemSize.width + nextItemSpace)) / 2
        minimumLineSpacing = itemSpace

        scrollDirection = .horizontal
        sectionInset = UIEdgeInsets(top: 0, left: itemSpace, bottom: 0, right: itemSpace)
        collectionView?.decelerationRate = .fast
    }

    override func targetContentOffset(forProposedContentOffset proposedContentOffset: CGPoint, withScrollingVelocity velocity: CGPoint) -> CGPoint {
        guard let offsetX = collectionView?.contentOffset.x else { return .zero }
        let pageWidth = itemSize.width + minimumLineSpacing
        let nextPage = getNextPage(velocity: velocity, currentPage: offsetX / pageWidth)
        delegate?.notificationDialogCollectionViewFlowLayout(pageDidChange: Int(floor(nextPage)))
        return CGPoint(x: nextPage * pageWidth, y: 0)
    }

    private func getNextPage(velocity: CGPoint, currentPage: CGFloat) -> CGFloat {
        if abs(velocity.x) > velocityThreshold {
            return velocity.x > 0 ? ceil(currentPage) : floor(currentPage)
        }
        return round(currentPage)
    }
}
注目すべきポイントは、override func targetContentOffset(forProposedContentOffset proposedContentOffset: CGPoint, withScrollingVelocity velocity: CGPoint) -> CGPoint です。このメソッドは、UICollectionView のインスタンスメソッドで、ユーザがスクロール中に指を離した時に呼ばれます。引数に、未来にスクロールが自然に止まるポイント(proposedContentOffset)と水平、垂直方向のスクロールスピード(velocity) を引数にとり、戻り値としてスクロールを停止するポイントを指定することができます。
    override func targetContentOffset(forProposedContentOffset proposedContentOffset: CGPoint, withScrollingVelocity velocity: CGPoint) -> CGPoint {
        // ...
    }
次に、ページスクロールのロジック部分です。まずは、ユーザが指を離した地点がどのページなのかを取得するために、1ページ分の横幅を let pageWidth = itemSize.width + minimumLineSpacing で取得します。今回の例では、Item の幅とその左のスペースを1ページ分の幅として取得しています。そして取得した pageWidth と offsetX を使用して現在のページを CGFloat として getNextPage() メソッドに渡します。
なぜ、CGFloat でページを渡すのでしょうか??理由は、小数にすることで現在スクロールが終了した時に、次どちらのページにスナップさせるのか計算するのが簡単になるからです。例えば、currentPage が 0.3 の場合、四捨五入すると 0 なので、次は 0ページになります。一方 currentPage が 0.8 だった場合は、四捨五入すると 1 になるので、次は 1ページになります。
nextPage が取得できたら、後はそのページを下に CGPoint を計算すれば、任意のページでスクロールを終了させることができます。また、pageControl などを使って現在のページを UI に反映したい時は、nextPage が取得できたタイミングで下記のように delegate?.notificationDialogCollectionViewFlowLayout(pageDidChange: Int(floor(nextPage))) メソッドで、ページの更新を通知しています。
    override func targetContentOffset(forProposedContentOffset proposedContentOffset: CGPoint, withScrollingVelocity velocity: CGPoint) -> CGPoint {
        guard let offsetX = collectionView?.contentOffset.x else { return .zero }
        let pageWidth = itemSize.width + minimumLineSpacing
        let nextPage = getNextPage(velocity: velocity, currentPage: offsetX / pageWidth)
        delegate?.notificationDialogCollectionViewFlowLayout(pageDidChange: Int(floor(nextPage)))
        return CGPoint(x: nextPage * pageWidth, y: 0)
    }

    private func getNextPage(velocity: CGPoint, currentPage: CGFloat) -> CGFloat {
        if abs(velocity.x) > velocityThreshold {
            return velocity.x > 0 ? ceil(currentPage) : floor(currentPage)
        }
        return round(currentPage)
    }
ちなみに、velocity(スクロールスピード) に応じて、次のページをハンドリングすることで、よりユーザが意図したページスクロールを実現することができるようになります。今回の例だと abs(velocity.x) > velocityThreshold の時、つまり、水平方向のスクロールのスピードが 0.1 よりも大きい場合は、左右どちらのスクロールでも、スクロールした方向にページが移動するようになっています。return velocity.x > 0 ? ceil(currentPage) : floor(currentPage) となっているのは、velocity.x が正の数の時(左スクロールの時は)、現在のページから次のページへと velocity.x が負の数の時(右スクロールの時は) 、現在のページから前のページへと進むことを意味しています。
        if abs(velocity.x) > velocityThreshold {
            return velocity.x > 0 ? ceil(currentPage) : floor(currentPage)
        }
以上が UICollectionView を使ったページスクロールの実装方法でした👷♀️ UICollectionView のページスクロールの実装方法にはこれ以外にも色々やり方はあると思うので、より良い方法がありましたら是非コメントなどで教えてください🛠 それでは、また明日!
参考
- https://techlife.cookpad.com/entry/2019/08/16/090000
- https://developer.apple.com/documentation/uikit/uicollectionviewlayout/1617729-targetcontentoffset
- https://swift.tecc0.com/?p=476